You’ve just arrived home, excited to finally break in your brand-new shoes — and then you notice it. The security tag is still attached. The store forgot to remove it, and now you’re stuck.
This is more common than you’d think. Before you panic or consider heading back to the store in frustration, take a breath. There are several practical, safe methods to remove a security tag from shoes at home — no magnet required.
Important note: Everything in this guide assumes you legally purchased your shoes. Removing a security tag from stolen merchandise is illegal. If you bought your shoes and just left with the tag still on, you’re in the clear — and we’ve got you covered.
Understanding Security Tags on Shoes
Before you attempt any removal method, it’s crucial to identify what kind of security tag you’re dealing with. Using the wrong method on the wrong tag type can permanently ruin your shoes — especially if ink is involved.
Here are the most common types found on footwear:
- Ink Tags: These are the ones you need to be most careful with. They contain a small vial of colored ink (often red, blue, or black) that will burst and stain your shoes if the tag is forced open incorrectly. They typically have a visible ink cartridge inside a clear plastic housing.
- Hard Plastic Pin-Style Tags: The most common type. A metal pin pierces through the material and locks into a plastic housing. These are the easiest to deal with using at-home methods.
- Soft Loop or Lanyard Tags: A plastic cable or fabric loop threads through a hole in the shoe or its tag. These are often used on high-end footwear. They’re usually the easiest to remove.
- RFID/EAS Tags: Thin, often flat tags that emit an electronic signal to trigger store alarms. These are less common on shoes but may appear as a sticker-style tag or embedded in the insole.
Key takeaway: If your tag is an ink tag, approach all removal methods with extra care and slow, deliberate movements. When in doubt, use the freezing method (Method 5) or simply return to the store.
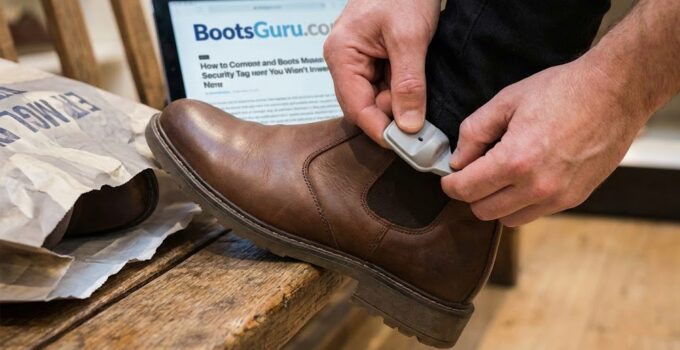
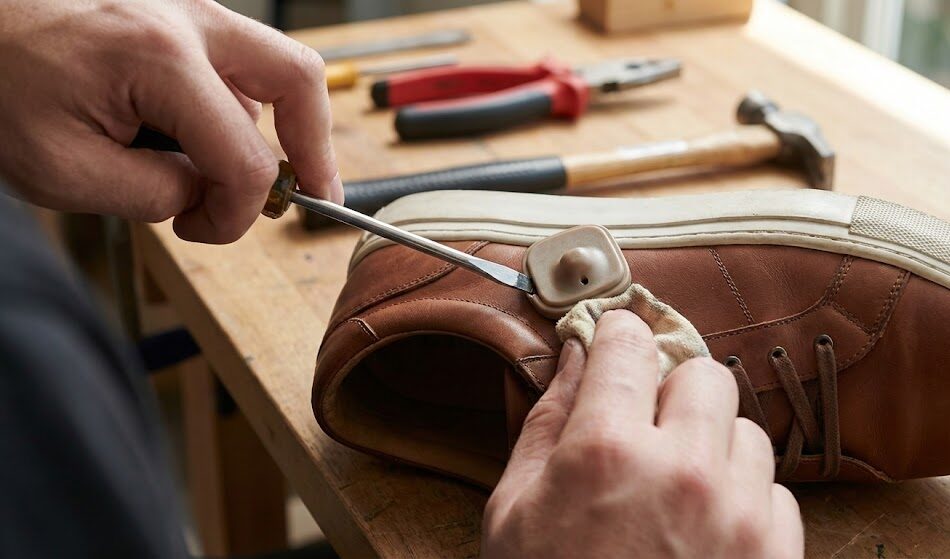
This image shows a pair of brown leather shoes alongside tools like pliers and a smartphone, highlighting techniques for removing security tags from shoes without using a magnet.
The Easiest Fix: Return to the Store
We know — this isn’t the answer you were hoping for. But if it’s at all convenient, returning to the store is genuinely the safest and fastest option. Staff have the proper magnetic detacher tool and can remove the tag in seconds without any risk of damage to your shoes.
Don’t worry if you don’t have your receipt in hand. Most retail staff will remove the tag if you can show proof of purchase in any form — a bank statement showing the transaction, a confirmation email, or even the original shoebox. Be polite, explain the situation, and you’ll almost certainly be helped without any issue.
If the store is far away, or you genuinely can’t go back, read on for the home methods below.
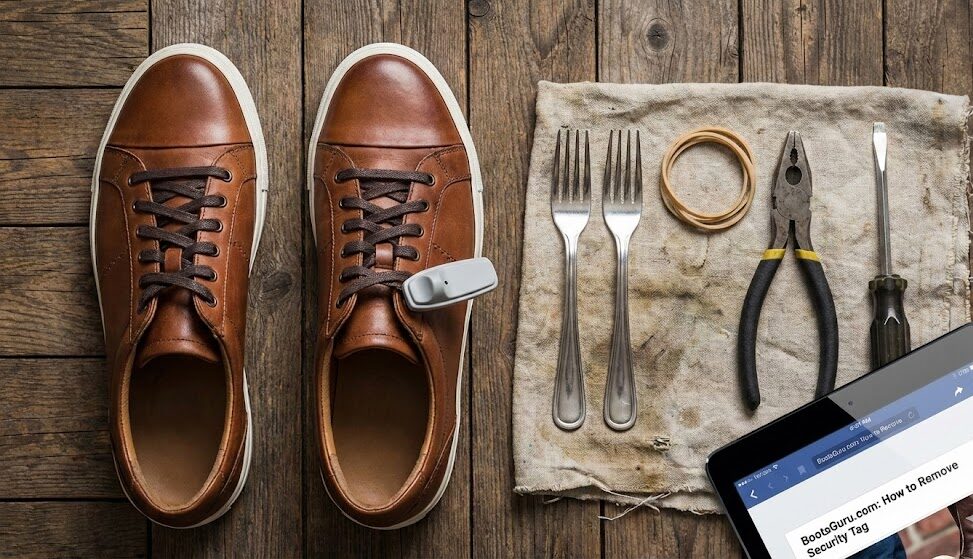
Methods to Remove a Security Tag Without a Magnet
Method 1: Using a Rubber Band
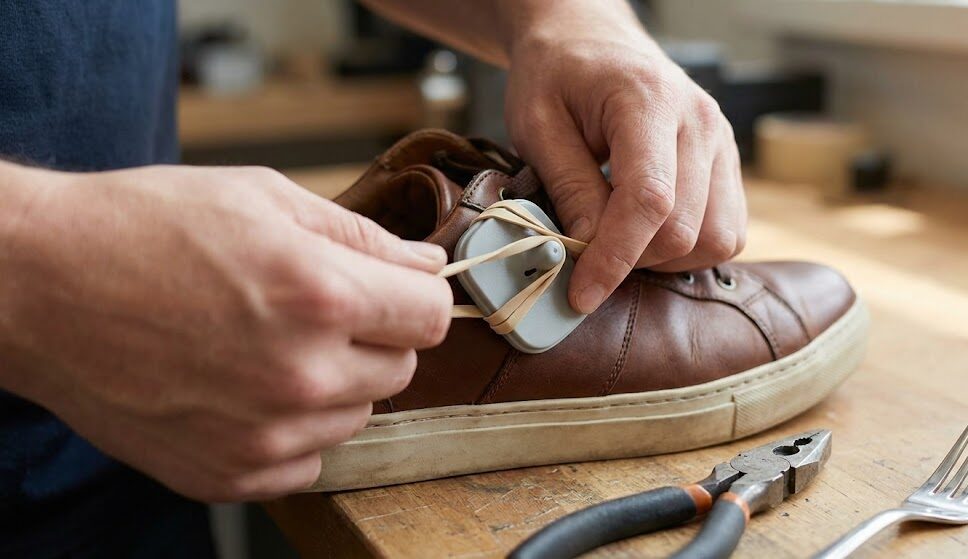
using a rubber band
Best for: Hard plastic pin-style tags | Risk level: Low
This is one of the most widely recommended at-home methods, and it works by using a rubber band to apply rotational force on the pin mechanism until it loosens and releases.
What you’ll need: A thick rubber band (the wider, the better)
Step-by-step:
- Hold the security tag firmly in one hand with the ink cartridge (if present) facing down toward the floor. This way, if any ink does release, gravity keeps it away from your shoe.
- Wrap the rubber band tightly around the pin area — the narrow section between the two halves of the tag.
- Use your fingers to grip through the rubber band and begin twisting, applying constant rotational pressure.
- Continue twisting — the friction helps the rubber band grip the pin mechanism and gradually work it loose.
- After enough rotations, you should feel or hear a small click as the pin releases. Gently pull the two halves apart.
This method requires patience. Don’t rush it or apply excessive force. If you feel significant resistance, stop and try a different method.
Method 2: Using Pliers or Wire Cutters
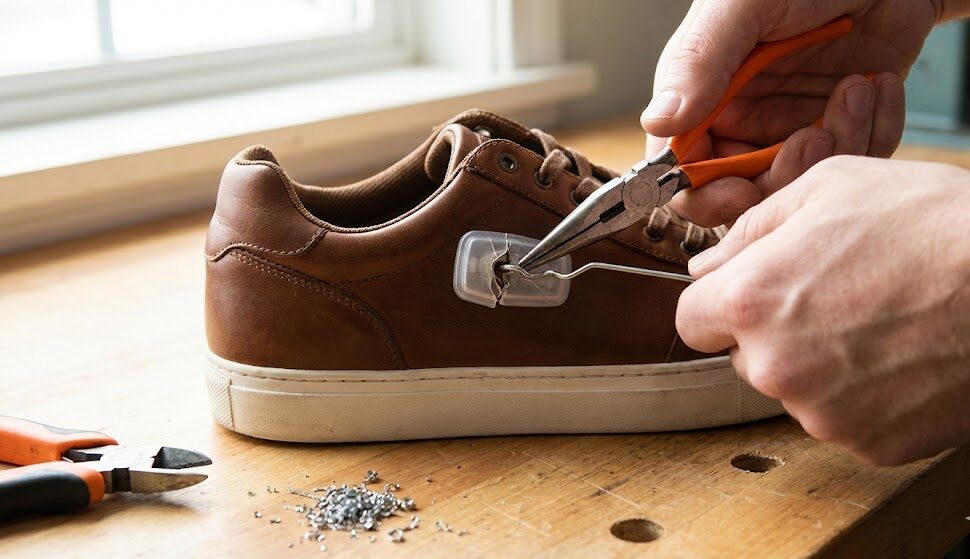
using pliers or wire cutters
Best for: Standard hard plastic tags (NOT ink tags) | Risk level: Medium
This method involves targeting the pin mechanism directly. It’s effective but requires care to avoid scratching or puncturing the shoe material.
What you’ll need: A pair of needle-nose pliers or wire cutters
Step-by-step:
- Locate the pin on the tag — it’s the metal spike that passed through your shoe material.
- Using needle-nose pliers, grip the pin as close to the base of the tag as possible.
- Bend the pin back and forth in short, controlled movements. The goal is to weaken and snap the pin, allowing the two halves of the tag to separate.
- Alternatively, use wire cutters to cut through the pin cleanly.
- Once the pin is severed or bent out of the locking mechanism, the tag should pull apart.
Warning: Do not use this method on ink tags. The pressure required risks cracking the plastic housing and releasing the ink. Additionally, be very careful not to press the tag against the shoe material — protect the upper with a cloth or piece of cardboard as a barrier.
Method 3: Using Two Forks

Best for: Hard plastic pin-style tags | Risk level: Low to Medium
A surprisingly effective method that uses leverage to pop the locking mechanism. You’ll find this one recommended widely across shoe forums and DIY communities — and for good reason. It works.
What you’ll need: Two standard dinner forks
Step-by-step:
- Hold the security tag so the larger, domed side is facing upward and the flat side (where the pin enters) is facing down.
- Insert the tines of one fork into the gap at the base of the tag — the narrow seam between the top and bottom halves, near the pin.
- Insert the second fork into the same gap from the opposite side.
- Use both forks as levers simultaneously — apply gentle, steady outward pressure, as if you’re prying the two halves apart.
- Work slowly around the seam until the locking pin releases and the tag opens.
The key here is slow, even pressure. Rapid or jerky movements can crack the tag or push the pin further into the locking mechanism.
Method 4: Using a Flathead Screwdriver
using a flathead screwdriver
Best for: Hard plastic pin-style tags | Risk level: Medium
Similar to the two-fork method, this technique uses a flathead screwdriver to pry open the tag’s locking mechanism with precision.
What you’ll need: A flathead screwdriver (medium size works best)
Step-by-step:
- Position the tag so the flat side (pin entry side) faces up.
- Slide the flat tip of the screwdriver into the seam on the side of the tag, near where the pin enters.
- Apply gentle twisting leverage — as if turning a key — to widen the gap.
- Work your way around the seam, repeating this twisting motion at different points.
- Once the internal locking mechanism disengages, the two halves will separate and the pin will slide free.
Protect your shoe by placing a folded cloth between the shoe material and your work area before starting. The screwdriver tip can scratch or scuff leather and synthetic uppers.
Method 5: Freezing the Tag (Best for Ink Tags)
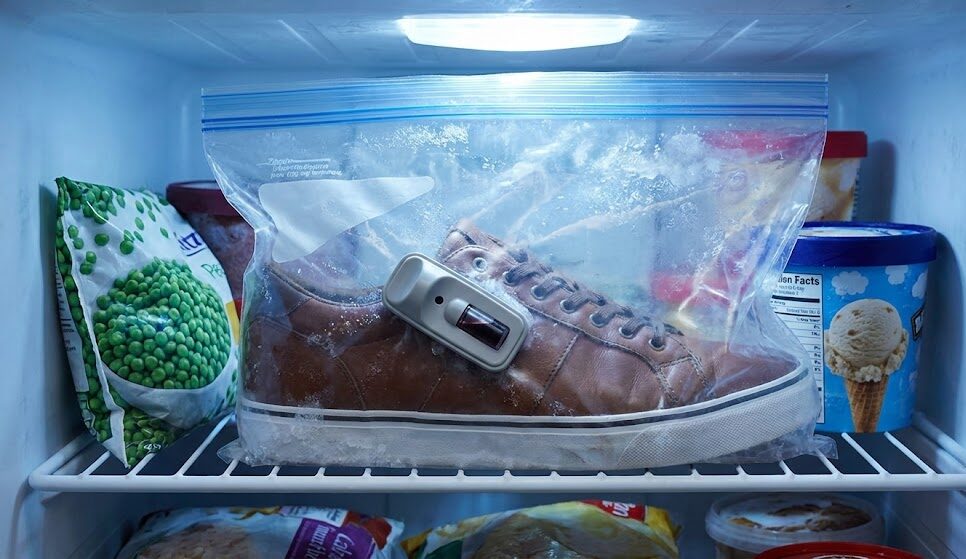
freezing the tag
Best for: Ink tags | Risk level: Low
This is the safest method for ink tags. Cold temperatures cause the ink capsule inside to become viscous and less likely to burst, buying you time and reducing risk when you apply physical force.
What you’ll need: A zip-lock freezer bag, access to a freezer
Step-by-step:
- Place the shoe inside a zip-lock freezer bag, pressing as much air out as possible before sealing. This protects the shoe from moisture during freezing.
- Put the bagged shoe in the freezer for a minimum of 3–4 hours. Overnight is even better.
- Remove the shoe from the freezer and work quickly — you want to work while the ink is still cold and thick.
- Use pliers, forks, or a screwdriver (as described above) to carefully pry the tag open.
- Keep the tag oriented with the ink capsule facing away from the shoe material as you work.
Note that freezing doesn’t eliminate the risk of ink release — it just reduces it significantly. Always work over a surface you don’t mind staining, and avoid pressing the tag against the shoe during removal.
Method 6: Cutting Loop or Lanyard Tags
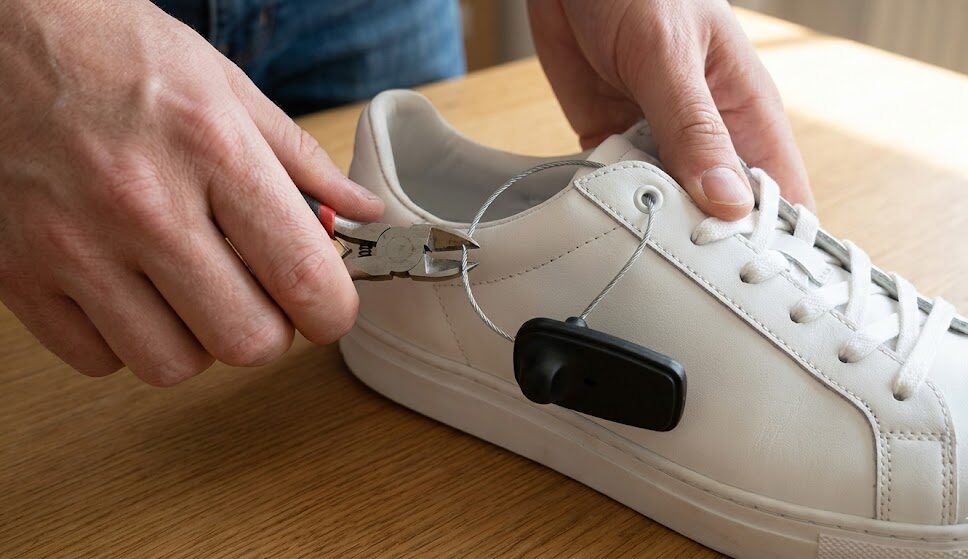
cutting loop or lanyard tags
Best for: Soft loop or fabric lanyard-style tags | Risk level: Very Low
If your security tag is attached via a plastic cable loop or fabric lanyard (rather than a metal pin through the shoe material), you’re in luck — this is the simplest removal of all.
What you’ll need: Sharp scissors, wire cutters, or a box cutter
Step-by-step:
- Identify where the loop or lanyard connects to the shoe or the shoe’s paper hang tag.
- If it threads through a hole in the shoe’s material, avoid cutting directly against the shoe. Slide a piece of cardboard between the loop and the shoe for protection.
- Use scissors or wire cutters to snip the loop cleanly in one cut.
- Remove the loop and discard the tag.
That’s it. No special technique required. Just be precise with your cut to avoid accidentally nicking the shoe itself.
What NOT To Do When Removing a Security Tag
A few methods floating around the internet are genuinely bad ideas. Avoid these at all costs:
- Don’t use fire or heat: Applying flame or a heat gun to melt a tag is a reliable way to permanently damage your shoe material and release toxic fumes from the plastic — or worse, trigger an ink explosion.
- Don’t drill the tag: The vibration and heat generated by drilling is highly likely to rupture an ink capsule and destroy your shoes.
- Don’t use excessive force on ink tags: Squeezing, hammering, or forcing an ink tag open without care almost guarantees a stained shoe. Work slowly, use the freezing method, and be patient.
- Don’t ignore the tag if you’re shopping elsewhere: A live security tag will set off alarms in other stores, which can be embarrassing and may require you to explain yourself to security staff. Deal with it before your next shopping trip.
- Don’t use a regular fridge magnet: It’s not strong enough. Store detachers are powerful industrial magnets — a standard kitchen magnet won’t do anything useful here.
Tips to Avoid This Problem in the Future
Once you’ve dealt with the frustration of a forgotten tag, you’ll want to make sure it never happens again. A few habits will help:
- Always check before you leave: When the cashier hands your shoes back, quickly run your hand over the toe, heel, and tongue area. Security tags are sometimes tucked inside the shoe or hidden in the box — give both a look before walking out.
- Watch the cashier scan each item: It only takes a few seconds to confirm that the tag has been removed, and it’s worth the momentary attention.
- Keep your receipt accessible: Even after you get home, keep your receipt somewhere easy to find for a few days. If you discover a tag later, you’ll need it when you return to the store.
- Check online shoe orders too: Some retailers attach security tags to shoes before shipping them. If your delivery arrives with a tag still on, contact the retailer immediately — they’ll usually ship you a prepaid return for the tag or walk you through their process.
Frequently Asked Questions
Will an ink tag definitely ruin my shoes if I remove it incorrectly?
Not guaranteed, but the risk is very real. Ink tags contain pressurized dye that can permanently stain fabric, leather, and synthetic materials. Even a small crack in the housing can cause a significant spill. The freezing method (Method 5) significantly reduces this risk, but working carefully and slowly is always the best approach.
Can I use a strong fridge magnet instead of a store detacher?
Unfortunately, no. The magnetic detachers used in retail stores are industrial-strength electromagnets, far more powerful than any household magnet. A standard fridge magnet — even a heavy-duty one — won’t generate nearly enough force to release the locking mechanism inside the tag.
Is it illegal to remove a security tag from shoes I bought?
No. If you legally purchased the shoes, the tag is your property and you have every right to remove it. The law only applies when security tags are removed from stolen merchandise with intent to shoplift. Keep your receipt just in case you ever need to demonstrate proof of purchase.
What if I lost my receipt?
Most stores will still remove the tag if you can show an alternative proof of purchase — a bank or credit card statement showing the transaction, a PayPal confirmation email, or a digital receipt. Be upfront with the staff about the situation. In most cases, they’re happy to help.
My tag set off an alarm in another store — what do I do?
Stay calm, stop walking, and explain to the security staff or employees that the tag was accidentally left on your legally purchased shoes. Show your receipt if you have it. This is a known and common situation — retail staff deal with it regularly and will help you resolve it quickly.
Will I damage my shoes if I try these methods?
If you’re careful and use the right method for your tag type, the risk to your shoes is minimal. The biggest dangers are ink staining (for ink tags) and scratching or scuffing the shoe material from metal tools. Use a cloth or cardboard as a protective barrier when using pliers or screwdrivers, and always work slowly.
Final Thoughts
A forgotten security tag is an annoying inconvenience, but it’s rarely a disaster. Armed with the right knowledge, you can remove almost any type of tag at home using tools you already own.
To recap: if your tag is a soft loop or lanyard type, a pair of scissors will solve your problem in ten seconds. For standard hard plastic pin-style tags, the rubber band, two forks, or screwdriver methods work well. If you’re dealing with an ink tag, always use the freezing method first to reduce the risk of staining.
And whenever possible, save yourself the hassle — just return to the store. It’s the quickest, safest, and most foolproof option available. Most staff will have it off in seconds and send you on your way with a smile.
Happy wearing!

")

