Trail running is the most demanding sport for footwear of any athletic category. Road running, for all its intensity, presents a single consistent surface: flat, hard, predictable. Every step lands in roughly the same way, on roughly the same material, at roughly the same angle. Shoe design for road running is a matter of optimising cushioning, energy return, and weight for a known and unchanging surface.
Trail running offers none of these certainties. Within a single hour on the trails you might cross hard-packed fire road, wet grass, loose gravel, exposed rock slab, rooted forest floor, and soft mud — each demanding something different from the shoe underfoot. The lug pattern that grips perfectly in mud becomes unstable on dry rock. The sticky rubber compound that works brilliantly on technical alpine terrain wears down in a season on abrasive hardpack. The waterproof membrane that keeps your feet dry on a cold November run traps sweat and overheats them in July. There is no single perfect trail shoe. There is only the right shoe for your terrain, your distance, your foot, and your conditions.
That variability is what makes choosing trail running shoes genuinely difficult — and what makes most buying guides inadequate. The guides that rank on the first page of Google describe terrain categories, mention lug depth in passing, and offer the same four pieces of advice in slightly different order. What they don’t do is explain the foam science that determines how long a shoe actually lasts, the specific reason why your overpronation assessment from a road running store may be irrelevant to trail running, the complete protocol for transitioning from road shoes to trail shoes without injuring yourself, or the rubber compound distinction that matters more than lug depth on technical rock.
This guide covers all of it. It is built from a competitive analysis of ten top-ranking articles on this topic, with every gap they leave identified and filled. Work through it once, and you will never need to guess at trail shoe selection again.
trail shoes vs road shoes 202605280836
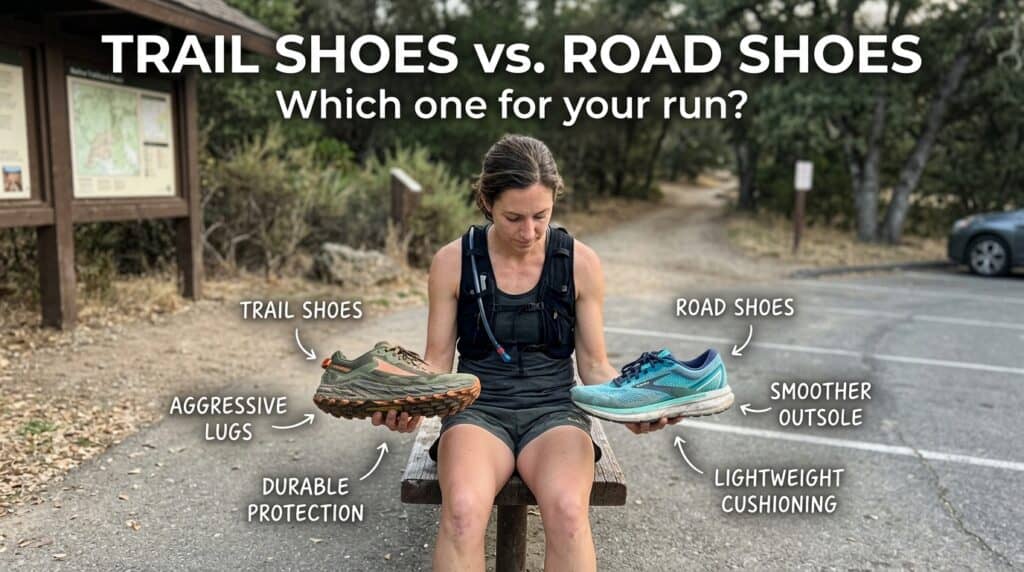
Trail Shoes vs. Road Shoes — What Is Actually Different and Why It Matters
The temptation when starting trail running is to assume your road shoes will do fine, at least on easier trails. Sometimes they will. More often, the differences between road and trail shoe construction become apparent within the first twenty minutes of running on real off-road terrain — and the failure modes can range from uncomfortable to genuinely dangerous.
Here is the complete structural comparison, not the simplified version:
| Feature | Road Running Shoe | Trail Running Shoe | Why It Matters on Trail |
|---|---|---|---|
| Outsole / lugs | Smooth or lightly textured rubber — optimised for consistent tarmac contact | Lugged rubber with 2–8mm protrusions — optimised for grip on varied and unstable surfaces | On wet grass, loose gravel, mud, or wet roots, a smooth road outsole provides near-zero lateral grip. This is a genuine hazard, not just a comfort issue. |
| Rock plate | Absent in almost all road shoes | Present in most trail shoes above entry level — carbon, TPU, or nylon plate between midsole and outsole | Running across sharp rocks and roots without a rock plate distributes point-load impacts directly through the midsole into the foot. Bruising and metatarsal stress are the result over distance. |
| Torsional rigidity | Low — road shoes are designed to flex naturally with a consistent stride on flat surfaces | Higher — trail shoes resist twisting along their long axis to prevent ankle collapse when landing on uneven surfaces | When your foot lands on a rock or root at an angle, a low-rigidity shoe allows the arch to collapse into the surface. A high-rigidity trail shoe transfers the angle to the whole foot evenly, reducing acute sprain risk. |
| Upper construction | Lightweight engineered mesh — breathability and weight are the priorities | Reinforced mesh or synthetic overlays — durability, debris resistance, and protection from rocks and branches | Road shoe uppers abrade and tear quickly on technical terrain. Trail uppers are built to withstand regular contact with rocks, roots, and vegetation. |
| Heel counter firmness | Moderate — enough for consistent heel containment on flat surfaces | Firmer — sufficient to hold the heel securely on lateral movements and uneven landing angles | Trail running regularly involves lateral foot movements that road shoes are not designed to support. A soft heel counter on uneven terrain allows heel slip that causes blisters and reduces ankle security. |
| Toe box protection | Minimal — lightweight mesh is the priority | Reinforced toe bumper — protects against rock strikes and root impacts | On technical terrain, the toes regularly contact rocks and roots at speed. Without a reinforced toe bumper, minor impacts become painful and repeated impacts become injurious. |
| Midsole stack height philosophy | High stack is increasingly standard for comfort and energy return on hard surfaces | Variable — lower stack for technical ground feel; higher stack for ultra-distance cushioning; both valid depending on terrain | High-stack road shoes create instability on uneven terrain. The extra foam that helps on tarmac becomes a wobble platform on rocks and roots. |
The bottom line: road shoes work acceptably on well-maintained gravel paths and dry fire roads. They fail — sometimes dangerously — on wet roots, loose gravel, exposed rock, muddy trails, and any surface where lateral grip and torsional support are required. The more technical the terrain, the more directly and quickly the limitations of road shoes become apparent.
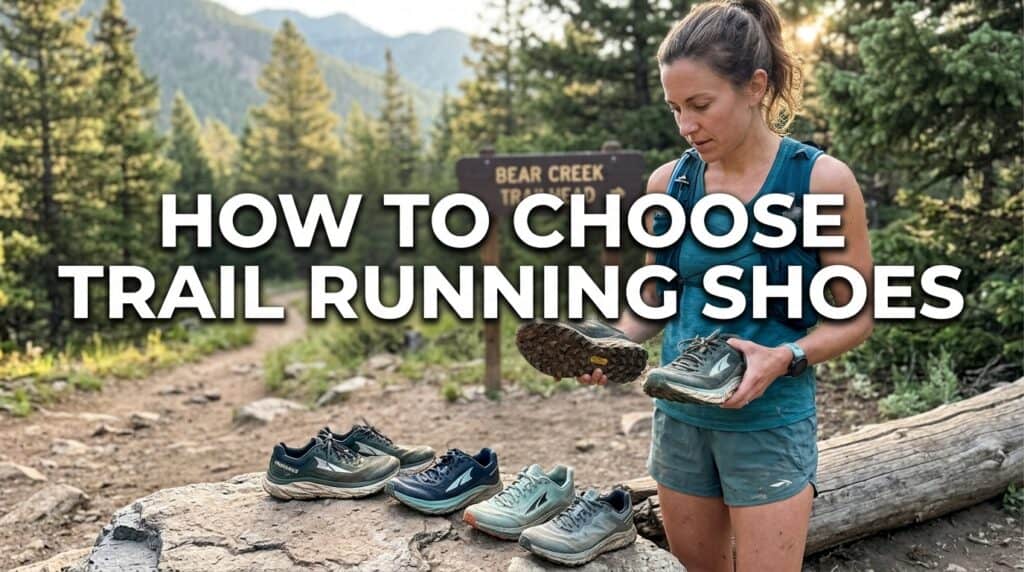
Woman examining trail running shoes on a forest trail, highlighting tips for selecting the right trail running shoes for outdoor adventures and optimal comfort.
Step 1 — Know Your Terrain: The Lug Depth, Spacing, and Rubber Type Decision
Terrain is the most important decision in trail shoe selection. It determines the outsole construction you need before any other feature is considered — and it is the decision that most guides handle least specifically. “Deep lugs for mud, shallow lugs for hardpack” is accurate but incomplete. The rubber compound, lug spacing, and lug geometry matter as much as lug depth, and on certain surfaces they matter more.
Here is the complete terrain-to-shoe specification guide:
| Terrain Type | Lug Depth | Lug Spacing | Rubber Compound | Rock Plate | Stack Height | Gore-Tex? |
|---|---|---|---|---|---|---|
| Hard-packed dirt / fire road | 2–4mm | Close (6–10mm gaps) — wide spacing provides no advantage on firm ground and creates instability | Standard durability rubber — sticky rubber unnecessary and wears faster on abrasive firm surfaces | Optional — firm ground generates less point-load impact | Moderate to high — comfort over long distances on firm terrain | Not needed unless cold. Warm-weather breathability is the priority. |
| Technical rocky mountain trail | 4–6mm | Moderate — adequate edge contact between lugs | Sticky rubber is the critical specification here — Vibram Megagrip or equivalent. On dry rock, a shallow-lug shoe with sticky rubber outperforms a deep-lug shoe with standard rubber. Friction grip, not lug penetration, is the mechanism on rock. | Strongly recommended — sharp rock impact protection is constant on this terrain | Low to moderate — better ground feel improves foot placement precision on technical sections | Yes in cold/wet mountain conditions; mesh in warm conditions for technical feel |
| Soft mud / fell running | 6–8mm | Wide spacing (12–15mm gaps) is essential — lugs must self-clean as the foot strikes; narrow spacing packs with mud and the shoe loses grip entirely | Harder rubber with defined lug edges — the lug geometry provides the grip, not the rubber tackiness; hard rubber maintains lug edge definition through repeated mud contact | Not needed — soft ground provides no sharp rock impact | Moderate — comfort over long fell distances | Counterintuitively: mesh is often better for deep mud — waterproof shoes fill with water at stream crossings and stay heavy; mesh drains quickly |
| Mixed / multi-surface | 4–5mm | Moderate | Balanced compound — adequate for both firm surface durability and moderate soft ground grip | Optional but useful — the most versatile setup for runners who don’t want to specialise | Moderate — the most versatile stack height | Your call based on climate and season |
| Alpine / snow / winter | 6mm+ with wide spacing | Wide — snow clearance is as important as grip | Cold-temperature compound — standard rubber stiffens significantly below 0°C (32°F) and loses grip even when the lug geometry is correct | Yes — frozen ground is as unforgiving as rock | Moderate to high — insulation buffer above the outsole helps in cold conditions | Yes — non-negotiable in snow and sustained cold |
The rubber compound insight that no competitor guide states clearly: On dry technical rock, the rubber compound matters more than lug depth. Vibram Megagrip and similar sticky rubber compounds grip rock through friction — they deform slightly under load and create adhesive contact with the surface. A shoe with 3mm lugs and sticky rubber will out-grip a shoe with 6mm lugs and standard rubber on a dry rock slab. This is the single most important technical specification for mountain and alpine trail runners, and it appears in the spec sheets of trail shoes but almost never in buying guides. Look for “Megagrip,” “Vibram,” “sticky rubber,” or equivalent language in the outsole description when buying for technical rocky terrain.
Step 2 — Match Cushioning and Stack Height to Your Distance and Running Style
Stack height is the amount of foam between your foot and the ground, measured at the heel and forefoot. It is the most visible difference between trail shoe categories and the one that most directly affects how a shoe feels underfoot. The right stack height depends on your terrain, your distances, your experience level, and what you want from the shoe.
| Stack Height Category | Approximate Measurement | Feel and Function | Best For | Caution |
|---|---|---|---|---|
| Low stack (minimal) | Under 22mm at heel | High ground feel — you sense every rock, root, and surface change. More precise foot placement on technical terrain. Lightweight. | Experienced trail runners on technical terrain who want precision and feedback; short to mid-distance fast efforts; runners transitioning toward more natural running form | Less protective against rock impacts; more fatiguing on long distances on rough terrain; harder transition from high-cushion road shoes |
| Moderate stack | 22–30mm at heel | The versatile middle ground — enough cushioning for all-day comfort, enough ground feel for moderately technical terrain. The choice for most trail runners. | Most recreational trail runners across all distances; daily training on mixed terrain; road-to-trail transitioning runners | Not the best at either extreme — less precise than low-stack on very technical terrain, less comfortable than high-stack on ultra distances |
| High stack (maximum cushion) | 30mm+ at heel | Maximum impact absorption — reduces fatigue over ultra-long distances; more comfortable on rough terrain over many hours. Can feel unstable on very technical sections. | Ultra-distance trail running (marathon+); runners whose primary concern is fatigue management on long days; beginners who are still developing trail-specific leg strength | Higher centre of gravity creates instability on narrow or uneven terrain; heavier; the comfort advantage reduces as trail technical difficulty increases |
One distinction worth understanding: stack height and cushioning softness are separate properties. A shoe can have a high stack of firm foam (high protection, low softness) or a low stack of soft foam (low protection, high softness). The stack height determines how much material is between your foot and the ground. The foam compound determines how that material feels and how much energy it returns. Both matter, and they interact — which brings us to the section that no competitor guide addresses.
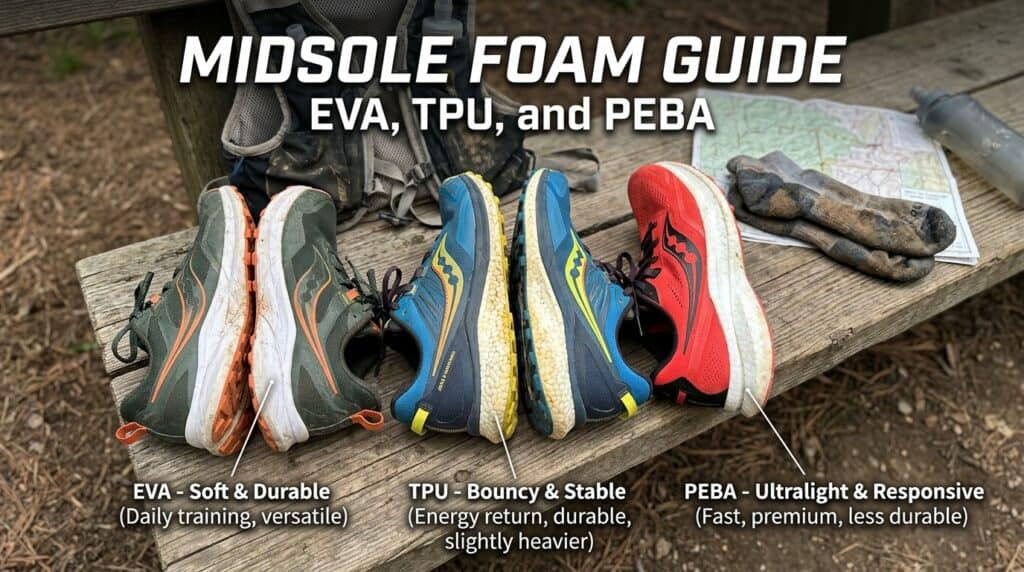
The Midsole Foam Guide: EVA, TPU, and PEBA Explained for Trail Runners
trail running shoe foam comparison 202605280838
Every trail shoe guide mentions “cushioning.” Almost none of them explain what the cushioning is made of, why different materials behave differently, or which foam type is actually appropriate for trail use versus road racing. The result is buyers who see “EVA midsole” on one shoe and “PEBA foam” on another with no idea which is better — or even what those terms mean.
Here is the complete foam guide, with the trail-specific context that makes the choice clear:
| Foam Type | Brand Names | Feel | Energy Return | Durability | Best Trail Application |
|---|---|---|---|---|---|
| Standard EVA (Ethylene-Vinyl Acetate) |
Brooks BioMoGo DNA, Saucony PWRRUN, Asics FlyteFoam (standard), most entry-mid trail shoes | Firm to moderate, consistent feel across temperatures | 55–65% — adequate, not exceptional | High — handles repeated compression and temperature variation better than newer materials | Daily training trail shoes, high-mileage runners, anyone prioritising longevity over peak performance. The most common trail shoe foam for good reason. |
| Supercritical EVA / POE | New Balance FuelCell, Brooks DNA Loft, Hoka ProFly, Altra EGO | Softer and bouncier than standard EVA — gas-injected to create foam bubbles that increase rebound | 65–72% — noticeably better than standard EVA | Moderate — the gas bubbles that improve bounce also compress more rapidly under load | Long trail runs where cushioning comfort matters; trail-to-road hybrid use; runners transitioning from high-cushion road shoes who want a familiar feel |
| TPU / Aliphatic TPU | Adidas Boost/Light Boost, Saucony PWRRUN PB, Puma Nitro, Hoka (select models) | Responsive and springy — maintains performance across a wider temperature range than PEBA | 70–75% — strong energy return with better durability retention over mileage | Good to very good — the most durable of the high-performance foams; retains bounce through more compression cycles | The best balance of performance and durability for trail use — increasingly common in mid-tier and premium trail training shoes. If you want better energy return than standard EVA without sacrificing longevity, TPU is the answer. |
| PEBA / Pebax | Nike ZoomX, Saucony PWRRUN HG, Hoka PEBA midsole (Tecton X 3), On Helion (select) | Very soft with the highest rebound — the “super foam” of running shoes | 78–82% — the highest energy return currently available in consumer trail shoes | Lower — compresses more rapidly under trail-specific point-load impacts; cold temperatures noticeably reduce bounce; more expensive per mile | Trail racing and fast efforts on race day. Not recommended as an everyday trail training shoe — the durability cost under trail conditions means you will replace it at roughly half the mileage of an EVA equivalent. |
The trail-specific insight that changes the decision: Trail shoes take abuse that road shoes don’t. Rocks, roots, and debris create point-load impacts — concentrated force on a small area — that compress foam differently and more aggressively than the distributed impact of road running. PEBA foam, which dominates road racing shoes and delivers extraordinary energy return on tarmac, is genuinely less durable under trail conditions than EVA or TPU. The extra performance per step costs more per mile on trails than it does on roads.
For most trail runners, durable EVA or TPU in a training shoe — saving PEBA for race day if at all — is a better investment than buying the highest-energy-return foam and replacing it twice as often. This is the decision the foam brand names obscure: an expensive shoe with PEBA foam may deliver fewer trail miles than a less expensive shoe with quality EVA, and the performance difference in training contexts is smaller than marketing suggests.
Step 3 — Choose Your Heel-to-Toe Drop
Heel-to-toe drop — often just called “drop” — is the height difference between the heel stack and the forefoot stack. It is measured in millimetres and it directly affects how your foot lands, how your stride unfolds, and what load is placed on different structures in your lower leg.
| Drop Category | Measurement | Effect on Running Form | Best For | Transition Risk |
|---|---|---|---|---|
| Zero drop | 0mm | The heel and forefoot sit at the same height — promotes a natural midfoot or forefoot landing; maximum Achilles and calf engagement | Experienced runners with established midfoot or forefoot strike; runners transitioning to more natural form who have done so gradually; Altra-brand users specifically | High — sudden switch to zero drop causes Achilles tendinopathy and calf strain in runners accustomed to heel-elevated shoes. Transition must be gradual (months, not weeks). |
| Low drop | 1–4mm | Near-flat platform — encourages mid/forefoot strike; slightly more Achilles demand than medium drop | Experienced trail runners on technical terrain; runners who have transitioned down from medium drop; natural runners who want a slight heel cushion buffer | Moderate — less aggressive than zero drop but still requires a transition period of 4–8 weeks if coming from 8mm+ shoes |
| Medium drop | 4–8mm | The most versatile range — accommodates a range of foot strike patterns without forcing form changes; the trail running standard | Most trail runners, including beginners; road runners transitioning to trail; anyone whose current shoes are in this range | Low — the universal starting point for trail running |
| Traditional / high drop | 8–12mm | Heel-elevated platform — matches most road running shoes; supports heel-strike running; reduces Achilles and calf demand | Runners transitioning directly from high-drop road shoes; those with Achilles tendon issues where heel elevation is part of management; beginners from road running background | Low for road-to-trail transition; high if transitioning down in drop simultaneously |
The most important practical rule: match your trail shoe drop to your current road shoe drop, or stay within 2mm of it, when you first start trail running. The trail surface already introduces enough new movement patterns and muscle demands without simultaneously changing the heel pitch your body has adapted to. Change the surface first. Change the drop later, gradually, if you choose to.
The Road-to-Trail Transition Safety Guide
This is the section that most trail running shoe guides don’t write — and most trail running injuries in new trail runners come from exactly this transition being made incorrectly. If you are a road runner moving to trails, read this before you buy a shoe.
The drop transition. Road running shoes typically have heel-to-toe drops of 8–12mm. Your Achilles tendons, calves, and plantar fascia have adapted to that pitch over months or years of running. If you buy a zero-drop or 4mm trail shoe because you’ve read that lower drop is better, and you go straight into trail running at your normal road mileage, you are very likely to develop Achilles tendinopathy, calf strain, or plantar fasciitis within the first three to four weeks. The tissues have not adapted to the increased load the lower heel pitch places on them.
The protocol: match your current road shoe drop in your first trail shoe, or go within 2mm lower. If your road shoes are 10mm drop, start trail running in 8–10mm drop trail shoes. After three to six months of trail running, if you want to transition lower, do so in a 2mm step with at least four weeks between each step down.
The mileage ramp. Do not convert 100% of your running to trails immediately. Start with 20–30% of your weekly mileage on trail and 70–80% on road. Trail running uses stabilising muscles in the ankles, hips, and core that road running does not activate to the same degree. Those muscles need four to six weeks of gradual loading before they are ready to handle a full training load on technical surfaces. Runners who go straight from road-only to trail-only training report ankle fatigue, hip soreness, and coordination issues that are not injury but are adaptation — the process is real and takes time.
The terrain progression. Start on the easiest trails available: well-maintained hard-packed paths, gentle gravel trails, flat forest tracks. Build comfort, stability, and terrain-reading skill over several weeks before moving to wet roots, loose rock, or significant elevation change. The technique for trail running — shorter strides, higher cadence, looking further ahead, lifting feet more deliberately — takes weeks to become instinctive. Attempting technical terrain before the technique is established is where ankle sprains happen.
The shoe choice for the transition. For road-to-trail transition specifically, the ideal first trail shoe has: a drop that matches your road shoes (or within 2mm); a moderate stack height for cushioning during muscle adaptation; a 4–5mm multi-directional lug for versatile grip on mixed terrain; and a firmer heel counter than your road shoes for ankle support on uneven surfaces. Do not start with an ultra-minimalist shoe, an aggressive fell racing shoe, or a zero-drop model regardless of how impressive they look. Those are specialist tools for experienced trail runners. Your first trail shoe should be versatile, protective, and forgiving.
The specific injury risks in the transition, and their causes:
Achilles tendinopathy — caused by excessive drop reduction combined with trail running’s natural tendency toward forefoot and midfoot striking on uneven ground. Solution: match road shoe drop in first trail shoe.
Ankle sprains — caused by unfamiliar terrain combined with insufficient ankle strength and technique development. Solution: terrain progression starting from easy trails; strength training for ankles and hips before moving to technical terrain.
Metatarsal bruising and stress — caused by running without a rock plate on rocky terrain, or by bringing high-stack road shoes onto trails where the extra height creates instability and changes landing mechanics. Solution: rock plate in trail shoe on any terrain with exposed rock; do not run road shoes on rocky trails.
Blisters — caused by trail shoes that fit as snugly as road shoes, combined with the descent toe-slide that trail running creates. Solution: size up half a size (covered in full in the fit section below).
Do You Need a Rock Plate?
A rock plate is a stiff layer inserted between the midsole and outsole of a trail shoe. Its purpose is to distribute the point-load impact of a sharp rock or root across a wider area of the midsole, preventing the impact from transmitting directly through foam and into the foot.
Rock plates are made from three main materials, each with different properties. Carbon fibre rock plates are the stiffest, lightest, and most protective — found in premium trail shoes and racing models, they offer maximum protection with minimal weight but reduce ground feel significantly. Nylon or TPU rock plates are less stiff than carbon but more flexible — they protect against most trail rock impacts while retaining more ground feel and at lower cost; this is the most common construction in quality mid-range trail shoes. Plastic or EVA stiffeners are the most basic option — they provide light rock impact resistance but deflect less force than carbon or nylon options and add some stiffness without the full protection of a proper rock plate.
Do you need one? On hard-packed smooth trails and fire roads: no. The absence of sharp rock impact means the rock plate adds stiffness and weight without providing proportionate protection. On moderately rocky mixed terrain: a flexible TPU or nylon rock plate is worth having, particularly as distances increase and foot fatigue reduces the precision with which you place each step. On technical rocky mountain terrain: yes, strongly. The frequency of sharp rock and root impacts at trail speed makes a rock plate a genuine injury-prevention tool rather than an optional feature. For fell running on soft, rooty, un-rocky ground: no — the soft surface provides natural deflection and the rock plate adds unnecessary stiffness.
One honest trade-off: rock plates reduce ground feel. The proprioceptive feedback — the subtle sensation of the ground surface through the shoe — that experienced trail runners use for foot placement on technical terrain is reduced by a stiff plate. Most trail runners on technical terrain accept this trade-off gladly. Some experienced runners on familiar routes prefer maximum ground feel and accept the impact risk. Know the trade-off and choose accordingly.
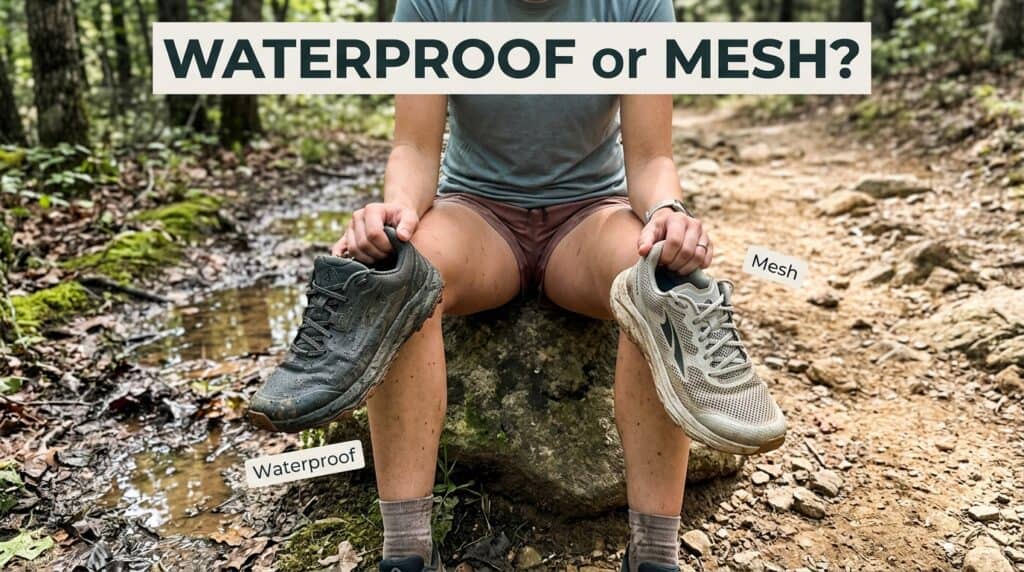
Waterproof or Mesh? The Complete Decision Framework
waterproof vs mesh trail shoes 202605280840
The standard advice on waterproof trail shoes is: “use Gore-Tex in wet and cold conditions, mesh in warm and dry conditions.” This is correct as far as it goes — but it leaves out the specific conditions where each choice is clearly right, the temperature factor that the precipitation question obscures, and the middle option that most guides never mention.
The key insight about waterproof trail shoes that is absent from every competitor guide: temperature matters as much as precipitation. Waterproof membranes like Gore-Tex work by blocking water from outside while allowing water vapour (sweat) to escape from inside. The vapour transmission rate — how quickly the membrane breathes — is sufficient in cold conditions when foot perspiration is relatively low. In warm conditions, foot perspiration increases substantially and exceeds the membrane’s vapour transmission capacity. The result: the shoe traps sweat inside. Above approximately 15–18°C (59–65°F), a Gore-Tex trail shoe can make your feet wetter from the inside than the rain makes them from the outside.
| Conditions | Recommendation | Reason |
|---|---|---|
| Below 10°C (50°F) + rain or wet trails | Waterproof membrane | Cold reduces foot perspiration rate; membrane keeps feet dry from external moisture; the damp-cold combination is where waterproof shoes are most clearly correct |
| 10–15°C (50–59°F) + rain | Either, with preference for waterproof if running over 60 minutes | Moderate conditions — waterproof is acceptable but sweat accumulation begins to be a factor; mesh dries quickly at these temperatures |
| Above 15°C (59°F) + rain | Mesh — waterproof makes feet wetter | Above 15°C the sweat accumulation inside a waterproof shoe exceeds the external moisture the membrane prevents. Your feet end up wetter in Gore-Tex than in mesh. |
| Snow and winter trail running | Waterproof membrane — non-negotiable | Snow melts immediately into mesh; cold temperature management and waterproofing are both required |
| Stream or river crossings planned | Mesh — drains faster after crossings | A waterproof shoe that fills with water in a stream crossing traps that water inside; mesh drains in minutes, waterproof membranes may stay damp for hours |
| Dry, dusty, or sandy conditions | Mesh with gaiter | No waterproofing needed; lightweight mesh with a short trail gaiter prevents debris entry more effectively than any membrane |
The DWR middle option: DWR stands for Durable Water Repellent — a chemical coating applied to the exterior of mesh trail shoes that causes water to bead and run off rather than immediately soaking through the fabric. A DWR-treated mesh shoe sheds light rain and light mud contact for the first 20–30 minutes of running before the coating saturates. DWR can be reapplied with spray-on products (Nikwax Footwear Proof, for example) as it wears off. For conditions that are mildly wet rather than sustained rain, DWR-treated mesh is a genuinely useful middle option — it handles most light precipitation without the sweat-trapping limitation of a full waterproof membrane. Most quality trail shoes ship with some DWR treatment applied; the key is maintaining it.
Gait Analysis for Trail Running — How It Differs from Road Running
If you have visited a road running store and been assessed on a treadmill, you may have been told you overpronate, supinate, or are a neutral runner. That assessment is accurate for the surface it was conducted on — a flat, consistent treadmill belt at a controlled pace. Its direct application to trail running is more limited than most people assume, and understanding why changes how you approach trail shoe selection.
The fundamental difference: Overpronation and supination, as assessed in a running store, describe a consistent pattern of foot roll that repeats predictably on a flat surface at a steady pace. On trails, the surface changes with every stride. Your foot lands at a different angle on nearly every step — on flat dirt, then on a root at 15 degrees, then on the edge of a rock, then on soft soil. The consistent inward roll that triggers a stability shoe recommendation on a flat treadmill is disrupted and varied by the natural irregularity of trail surfaces.
Trail running shoes address gait variation through torsional rigidity and outsole geometry rather than the medial posting used in road stability shoes. A medial post is a denser block of foam on the inner side of the midsole that physically limits inward roll — it works well on a consistent surface where the roll pattern is predictable, but it can create problems on terrain where the foot needs to move naturally in multiple directions. Trail shoe torsional rigidity provides overall structural support without restricting the multidirectional movement that trail running requires.
| Gait Type | Road Shoe Recommendation | Trail Shoe Recommendation | Why Trail Differs |
|---|---|---|---|
| Neutral | Neutral cushioned road shoe | Neutral trail shoe — widest selection available | No difference; neutral suits both contexts equally well |
| Mild overpronation | Mild stability shoe | Neutral trail shoe in most cases | Trail surface variation naturally moderates the consistent inward roll pattern. Most mild overpronators run comfortably and without injury in neutral trail shoes. Try neutral first before seeking trail stability options. |
| Significant overpronation with pain or injury history | Stability or motion control road shoe | Trail-specific stability shoe (Asics Gel-Trabuco, Brooks Caldera) — but start with neutral and add stability only if pain persists on trail | Trail stability shoes exist and are effective; but the trail surface often moderates severe overpronation naturally. The medial posting approach that is standard in road stability shoes is less universal in trail applications. |
| Supination / underpronation | Neutral, flexible, cushioned road shoe | Neutral trail shoe with good cushioning and lower torsional rigidity | Supinators need flexibility. A rigid, high-torsional-rigidity trail shoe amplifies supination problems. Choose trail shoes described as flexible with good forefoot cushioning. Avoid stiff carbon-plated trail racing shoes. |
Self-assessment tools for trail runners without access to gait analysis:
The wet foot test: wet the bottom of your foot and step onto a dry surface. A complete footprint with little visible arch indicates flat feet with probable overpronation tendency. A footprint with a narrow band at the arch or no midfoot contact at all indicates high arches with probable supination tendency. A moderate arch visible on the print indicates neutral mechanics. This is a rough guide, not a clinical assessment — but it is useful for trail runners in locations where specialist running store gait analysis is not accessible.
The shoe wear pattern test: examine the soles of well-worn running shoes. Wear concentrated on the inner heel and ball of the foot indicates overpronation. Wear concentrated on the outer edge indicates supination. Even wear across the ball and heel indicates neutral mechanics. More useful as a confirmation tool than a primary assessment.
Torsional Rigidity and Upper Construction — The Structural Details That Prevent Ankle Sprains
Torsional rigidity is the property of a shoe that describes how much it resists twisting along its long axis — from heel to toe. It is mentioned in approximately one in ten trail shoe buying guides, and explained in almost none. Yet for trail running specifically, torsional rigidity is one of the most injury-relevant structural properties a shoe has.
Here is why it matters and how to assess it. When your foot lands on a rock or root at an angle — which happens repeatedly and unpredictably on technical terrain — one of two things happens. Either the shoe twists to match that angle (low torsional rigidity) and the arch collapses into the surface, loading the ankle and arch in a compromised position. Or the shoe resists that twist (high torsional rigidity) and distributes the angle across the whole foot evenly, reducing the concentrated load on the ankle joint. The difference between these two scenarios, repeated over thousands of steps on a technical trail, is the difference between confident stability and chronic ankle fatigue — and in acute form, between a normal run and a sprain.
How to test torsional rigidity: Hold the toe of the shoe in one hand and the heel in the other. Try to twist them in opposite directions — as if you are wringing out a towel. A shoe with good torsional rigidity for technical terrain resists noticeably and springs back. A shoe with low rigidity twists easily through the midfoot. Do this test in the shop before buying. For firm, well-maintained trails, moderate rigidity is fine. For rocky, technical, or loose-surface terrain, choose a shoe that resists the twist test firmly.
Torsional rigidity is influenced by several construction elements. A rock plate significantly increases rigidity throughout the midfoot — one reason why rock plates are recommended for technical terrain beyond their role as impact protection. TPU overlays on the upper and shank plates beneath the midsole add rigidity. The midsole compound itself contributes: firmer foam is inherently more rigid than soft foam.
The gusseted tongue is a related upper construction feature that almost no buying guide explains. A gusseted tongue is attached to the upper along both sides rather than just the midfoot — creating a sealed pocket around the foot that prevents debris from entering the shoe. Without a gusseted tongue, the gap between the tongue and the upper becomes an entry point for trail debris: sand, gravel, small stones, and dirt that work their way in during longer runs and create hot spots and blisters. Gusseted tongues are standard on quality trail shoes but not universal — look for the term specifically in the product description if debris is a problem on your trails, particularly on dusty, sandy, or loose terrain.
The Complete Trail Shoe Fit Guide
Fit is the most frequently discussed trail shoe topic and the most frequently mishandled. The “size up half a size” rule is correct as a default — but it is a starting point, not a complete answer, and applying it without the edge cases produces fit problems that cause the exact issues it was meant to prevent.
Why trail shoe sizing differs from road shoe sizing. On a road run, your foot moves forward in the shoe primarily on the same predictable stride cycle. On a trail run, your foot moves forward on every descent — as the gradient increases, the forward slide of the foot inside the shoe increases proportionally. A shoe that fits snugly at your road shoe size will have your toes contacting the front of the shoe on any significant descent. Over a long enough run, or enough descents, this produces bruised toenails and black nails — the most common trail running foot complaint and the most preventable.
Additionally, feet swell more on trail runs than road runs, for multiple reasons: longer durations, more varied muscular activity, heat in summer conditions, and the terrain variation itself. A shoe that felt fine at mile three may feel tight at mile ten.
| Situation | Sizing Recommendation | Why |
|---|---|---|
| Standard terrain, moderate distances (under 15 miles) | Half size up from road shoe size | Standard trail swell and descent toe-slide; thumb’s width at the longest toe provides adequate buffer |
| Primarily flat hard-pack, short distances | Half size up is still preferred; same size acceptable | Less descent impact reduces the urgency, but half size up rarely causes problems and prevents edge cases |
| Ultra-distance running (26 miles+) or hot weather running | Full size up — or at minimum half size with wide toe box consideration | Foot swell on ultra distances and in heat can exceed what a half size up accommodates. Many ultra DNS/DNF outcomes trace back to toe box problems in the second half of the race. |
| Wide toe box brands (Altra, Topo Athletic) | Same size or half size up — the wide toe box accommodates foot splay that sizing up provides in standard-width shoes | The main purpose of sizing up in standard-width shoes is to prevent toe compression during splay and descent; wide toe box designs address this structurally |
| Narrow-footed runners sizing up | Half size up PLUS consider a narrower-width option or volume-reducing insole | Sizing up without addressing width creates heel slip, which is an independent blister cause. Toe room and heel security are not the same problem. |
| Salomon shoes specifically | Size up at least half, possibly a full size | Salomon’s last is distinctively narrow and tends to run long — the combination means sizing up is more frequently necessary than in other brands. Wide-footed runners should specifically seek the Salomon “Wide” variant where available. |
| Hoka shoes specifically | True-to-size is more often correct | Hoka’s last runs roomy — the wider standard construction typically accommodates foot splay without requiring a size increase in most models |
| Altra shoes specifically | True-to-size — Altra’s FootShape toe box is the widest standard on the market | The wide toe box design addresses foot splay structurally; the half-size-up rule applies much less strongly |
| Inov-8 shoes specifically | Half size up standard; wide-footed runners may need full size up | Inov-8 runs narrow — a brand designed around fell running on narrow-footed terrain; particularly snug in the midfoot |
The definitive fit test applies to any trail shoe regardless of the sizing rules above: put on the socks you will actually run in (trail socks, not thin road running socks — the difference can be significant). Stand up. Press your thumb or index finger into the space between the end of your longest toe and the front of the shoe. You should feel at least a thumb’s width (approximately 12–15mm) of space. Check this standing, not sitting — your foot lengthens under body weight. If you cannot fit a thumb’s width while standing, size up regardless of what the number says.
A diagnostic for black toenails: If you consistently lose toenails on trail runs, the problem is either insufficient length (toe box too short — size up) or insufficient width (toe box too narrow — the foot compresses sideways and the nail jams the upper laterally). Diagnose which it is by noting where the nail damage appears: front of the toe suggests length; side of the toe suggests width. The solutions are different and both are fixable.
Your First Trail Shoe — A Quick-Start Guide for Beginners
The majority of trail shoe guides are written implicitly for runners who already have some trail experience — who have preferences about lug depth, who know whether they prefer low or high stack, who have a go-to terrain type. If you are considering your first trail shoe and have none of these reference points, much of the buying advice in most guides is unhelpful: you are being asked to optimise for preferences you have not yet developed.
Here is what a beginner actually needs to know.
What to prioritise in your first trail shoe. Three things matter most, in order: adequate toe room (half size up, as described above); a firm heel counter for ankle support on the uneven surfaces you are still learning to navigate; and a 4–5mm multi-directional lug pattern that handles both firm and soft trails adequately. These specifications describe a versatile, forgiving shoe that performs competently on most recreational trail terrain — not the best shoe for any specific terrain type, but a capable shoe for all of them. That versatility is exactly what a beginner needs while building terrain familiarity and preference.
What to ignore in your first trail shoe. Weight — a gram difference that elite runners feel is imperceptible at beginner paces and training volumes. Foam technology — the difference between standard EVA and premium TPU in a beginner training shoe matters less than fit and lug pattern. Aggressive lug depth — a 6–8mm fell shoe looks serious and performs excellently in deep mud; it also feels unstable on firm trails and wears down quickly on abrasive surfaces. If your trails are mixed, it will be a compromise from the start. Maximum cushion or minimum cushion extremes — both are specialist choices; the moderate stack option serves beginners better while the body adapts to trail-specific loads.
The specific mistake most beginners make: buying the most technical, most aggressive shoe they can find because it looks capable and serious — then discovering that it is uncomfortable on the moderate trails they actually run, unstable in a different way than they expected, and harder to learn trail technique in than a more forgiving option would have been. Start versatile. Specialise after six months when you know what your trails demand and what your preferences are.
A simple decision flowchart for beginners:
Are you primarily a road runner moving to trails? → Match your current road shoe drop. Choose moderate stack. Choose 4–5mm multi-directional lug. Size up half a size. That is your first trail shoe specification.
Are you new to running entirely and starting on trails? → Same specification, but lean toward higher stack for cushioning during the muscle adaptation period. Do not start in zero-drop or minimal-stack shoes.
Do you already know your primary terrain will be technical and rocky? → Add a rock plate to the specification above. Everything else stays the same.
Do you already know your primary terrain will be wet and muddy? → Increase lug depth to 5–6mm and prioritise wide lug spacing. Everything else stays the same.
Socks and Gaiters — The Guide Every Competitor Ignores
Trail running sock and gaiter selection is absent from virtually every trail shoe buying guide, which is a significant omission. Sock choice directly affects shoe fit — a pair tested with thin road running socks and purchased for use with thick trail socks will feel different on your actual runs. And gaiters are one of the most underused performance tools in trail running, solving the debris-entry problem more effectively than any shoe design at a fraction of the cost.
Trail running socks. The primary difference from road running socks is material and construction. Cotton socks are the worst choice for trail running — they absorb moisture and hold it, creating the warm, wet environment that causes blisters. Road running synthetic socks are better, but trail running creates more dynamic foot movement and more debris contact than road running; socks designed for trail specifically have reinforced heels and toe seams positioned to reduce friction at the points where trail running creates the most contact.
Merino wool trail socks are the most popular choice among experienced trail runners for multiple reasons: they regulate temperature effectively (warm when cold, cooler than synthetic when warm), they resist odour considerably better than synthetic alternatives, and they remain relatively comfortable when wet rather than slipping and bunching. The trade-off is durability — merino is softer and less abrasion-resistant than synthetic; quality merino trail socks with nylon reinforcement in the heel and toe zone address this.
Technical synthetic trail socks (Drymax, Balega, Smartwool Run series) prioritise moisture transfer and are excellent for hot-weather trail running where temperature regulation is less important and moisture management is paramount.
For ultra-distance trail running specifically, double-layer anti-blister socks (Wrightsock, Injinji toe socks) are widely used. Double-layer socks move friction between the sock layers rather than between sock and skin — the mechanism that causes most blisters is displaced away from the foot entirely.
Sock thickness and shoe fit: If you sized your trail shoes wearing thin road running socks and then switch to thick trail socks, your fit changes. The additional sock volume can reduce toe room, increase midfoot pressure, and change heel security. Always try trail shoes with the socks you intend to run in. This is not a trivial detail — a 1–2mm thick merino sock versus a thin liner changes the effective internal volume of the shoe measurably.
Trail gaiters. Gaiters are fabric covers that attach from the lace loops or hooks on the shoe’s forefoot and wrap around the ankle collar, sealing the gap between shoe and sock through which trail debris enters. They are simple, lightweight, and extraordinarily effective at the one problem they solve.
Short trail gaiters (as opposed to full hiking gaiters that extend up the calf) are the relevant option for trail running. They weigh 30–50 grams per pair, attach in under 30 seconds, and prevent sand, gravel, seeds, and small stones from entering the shoe entirely. On sandy desert trails, crumbly volcanic terrain, loose scree, and any surface that generates small debris, they transform the running experience — debris entry is one of the leading causes of mid-run stops and hot spots.
Many quality trail shoes now have built-in gaiter tabs or attachment hooks specifically for short trail gaiters — a feature worth noting in the product description if debris is a regular problem on your trails. Brands offering compatible gaiters include Dirty Girl Gaiters (lightweight and widely compatible), Race Ready, and brand-specific options from Salomon and Hoka that match their respective shoe attachment systems.
When not to use gaiters: in very hot conditions where airflow around the ankle contributes to cooling; in stream crossing terrain where drainage speed is important; and in conditions where a gaiter can trap moisture against the shoe collar and cause chafing.
Trail Shoe Lifespan — How Long They Last and How to Know When They Are Done
The standard guidance on running shoe replacement — 300 to 500 miles — applies to trail shoes, but with an important qualification: trail shoes often reach the end of their functional life through outsole lug wear before the midsole foam has degraded, which is the opposite of what happens in road shoes. Understanding which part fails first on trail changes both when you replace your shoes and what you look for when assessing them.
On road shoes, the midsole foam is the primary wear mechanism — the cushioning compresses and loses its ability to absorb impact. The outsole rubber wears but more slowly. The shoe may look fine from the outside while the midsole has lost significant protective capacity.
On trail shoes, the outsole lugs bear the primary abuse. Sharp rocks grind down lug edges, technical terrain abrades rubber compounds, and the mechanical grip that lugs provide diminishes as their geometry rounds off. A trail shoe with flattened, rounded lugs provides significantly less grip than the same shoe with sharp lug edges — regardless of what the midsole cushioning does. For trail runners, lug condition is the most direct indicator of a shoe’s remaining functional life.
Signs your trail shoes need replacing: lugs that are noticeably rounded or worn flat rather than having crisp, defined edges; visible compression lines or creasing in the midsole foam that persists after the shoe has rested overnight; grip that feels noticeably reduced on the same surfaces where the shoe previously performed well; new or increased aches in the knees, hips, or lower back after runs where no change in training load has occurred (a sign of midsole degradation); or upper damage — tears, significant seam separation, or collapsed heel counter — that affects structural integrity.
Extending trail shoe lifespan. Clean trail shoes after muddy or sandy runs — mud left to dry in the lugs acts as an abrasive on subsequent runs, accelerating lug wear. Use a stiff brush and water; avoid machine washing which can damage adhesives and waterproof membranes. Dry trail shoes at room temperature away from direct heat — direct sun and radiator drying degrades foam and adhesives faster than ambient drying. Use your trail shoes only on trail — wearing them on tarmac to and from the trailhead wears the lugs on an abrasive surface for no performance benefit. If possible, have a separate pair of road shoes for the road sections of your run.
The Shoe Rotation Guide — Reduce Injury Risk with Two Pairs Instead of One
Rotating between two or more pairs of trail running shoes is the most consistently underused injury-prevention strategy available to recreational trail runners. It requires buying an additional pair of shoes — which is the obvious reason most runners resist it — but the evidence for its effect on injury risk is specific and significant.
A 2013 study by researchers at the University of Luxembourg, published in the Scandinavian Journal of Medicine and Science in Sports, examined injury patterns across 264 recreational runners over 22 weeks. Runners who rotated between multiple pairs of running shoes had a 39% lower risk of running injury than runners who used a single pair exclusively. The mechanism proposed: different shoe designs create different biomechanical loading patterns on the muscles and tendons of the lower leg. Alternating between designs varies that loading, preventing the repetitive stress overload that causes most overuse injuries. The variety itself is protective.
There is a secondary mechanism that also matters for trail runners specifically: midsole foam recovery. Running shoe midsole foam compresses under body weight during each run and takes 24 to 48 hours to fully decompress and return to its optimal cushioning and energy-return properties. A runner who runs every day in a single pair is using compressed foam for every run after the first. Rotating between two pairs means each shoe is always running on foam that has fully recovered.
The practical trail shoe rotation for recreational runners:
A two-shoe rotation covers most training needs. One versatile daily trainer — moderate stack, 4–5mm multi-directional lug, your primary everyday trail shoe. One specialist shoe for specific terrain or sessions — a more cushioned option for long days, a more aggressive lug option for muddy conditions, or a lighter faster option for tempo and race efforts. These two shoes need not be purchased simultaneously — build the rotation as your existing shoe approaches replacement.
A three-shoe rotation is used by more serious trail runners and covers the full range of trail running contexts: a cushioned shoe for long slow runs and recovery runs where mileage accumulation and comfort are the goals; a more technical shoe for harder terrain and shorter efforts where grip and ground feel matter; and a racing shoe for events where performance per gram is worth trading against durability and cost. Expert running industry veterans use this structure specifically: long cushioned runs, technical grip work, and up-tempo efforts each call for different shoes.
You do not need to start with three shoes. One good trail shoe and an intention to build a rotation when it wears out is a more practical starting position than buying three pairs simultaneously. The principle is simple: variety in loading is protective, and foam recovery between runs improves each run’s performance.
8 Common Trail Shoe Buying Mistakes
1. Buying wrong-terrain shoes. An aggressive 7mm-lug fell shoe purchased because it looked capable turns out to be unstable on the hard-packed trail that represents 80% of your actual running. Aggressive lugs offer no grip advantage on firm surfaces and create a rocking instability that is particularly pronounced at speed. Match the lug specification to your primary terrain, not to the most demanding terrain you might occasionally run.
2. Not sizing up. The snug fit that felt right in the shop floor destroys toenails on the first long descent. Descents push the foot forward into the shoe. Size up half a size as a default; full size for ultras and hot-weather running.
3. Testing only on flat surfaces in the shop. A flat shop floor does not simulate the descent toe-slide that sizing is designed to prevent. The only meaningful in-store test is a descent. If the shop has stairs, a ramp, or a treadmill with incline, test on a downhill before committing. If testing online, use the return window to test on an actual trail descent before wearing the shoes into mud.
4. Copying a sponsored athlete’s shoe choice. Elite trail runners are sponsored, meaning the shoe brand chose them partly because their running style suits the shoe’s design. Their terrain, their gait, their weekly mileage, and their experience level are all different from yours. The shoe that wins ultra-marathons in professional hands is often a specialist race-day tool that is punishing as a training shoe at recreational pace. Start with a versatile shoe and earn your specialist preferences.
5. Buying Gore-Tex for warm-weather running. The temperature/sweat trap described in the waterproof section above. Above 15°C in rain, a waterproof shoe is often making your feet wetter from inside than the rain makes them from outside. Buy a DWR-treated mesh shoe and a gaiter for warm-wet conditions instead.
6. Applying road gait analysis directly to trail shoe selection. Being told you overpronate on a flat treadmill in a running store does not necessarily mean you need a trail stability shoe. Trail surfaces vary your landing angle on every stride, moderating the consistent inward roll that a flat treadmill captures. Try a neutral trail shoe first and move to a stability model only if pain or injury persists on trail specifically.
7. Keeping trail shoes past their lug life. Trail shoes lose grip through lug wear before the upper visibly deteriorates or the foam obviously collapses. If you notice reduced traction on familiar surfaces — particularly on wet roots and loose ground — the shoe has reached end of functional life regardless of how it looks. Running on worn-lug trail shoes on wet technical terrain is a genuine fall risk.
8. Prioritising weight above all else. The lightest trail shoes available are almost universally race-day shoes — designed for the minimum weight acceptable for one race effort, not for repeated training use. A trail shoe that is 25 grams lighter but lasts half the mileage is not a lighter shoe over a training cycle — it is a more expensive shoe. Fit, terrain-match, and durability outrank weight for all but the most competitive racing contexts.
The 6-Question Trail Shoe Decision Framework
This framework distils the entire guide into six questions. Answer them in order and you will arrive at a clear specification for your next trail shoe.
Question 1: What surface do you primarily run on? This is the most important question and it should be answered before any other feature is considered. Use the terrain decision table earlier in this guide to identify your lug depth, lug spacing, and rubber compound requirements. Hard-pack and fire roads: 2–4mm multi-directional, standard rubber. Technical rock: 4–6mm, sticky rubber (Vibram Megagrip or equivalent). Mud and fell: 6–8mm, wide-spaced, harder rubber. Mixed: 4–5mm multi-directional, balanced rubber.
Question 2: How far do you typically run? Under 10 miles: moderate stack, any lug depth appropriate for your terrain. 10–26 miles: increase cushioning priority, verify sizing is adequate for swelling. 26 miles and above: maximum toe room, proven fit only — no new shoes for race day, and lean toward high cushion for fatigue management over distance.
Question 3: Are you coming from road running shoes? If yes, match your current drop (or within 2mm). Do not jump to zero-drop. Read the road-to-trail transition section before your first trail run and apply the mileage ramp protocol.
Question 4: What conditions do you run in — wet, cold, dry, or mixed? Below 10°C plus rain: waterproof membrane. Above 15°C in any weather: mesh with DWR. Winter and snow: waterproof non-negotiable. Stream crossings or sustained warmth: mesh drains better and breathes better. See the full waterproof decision table above.
Question 5: What is your gait type? Neutral or mild overpronation: neutral trail shoe. Significant overpronation with trail-specific pain or injury history: trail stability model, but try neutral first. Supination: neutral trail shoe with good cushioning and lower torsional rigidity — avoid stiff carbon-plated models.
Question 6: How technical is your terrain? Groomed trails and fire roads: rock plate optional. Moderately rocky mixed terrain: flexible TPU rock plate recommended. Technical rocky mountain terrain: firm rock plate strongly recommended plus sticky rubber outsole. Soft fell and muddy trail: rock plate not needed — the ground is the protection.
FAQ: How to Choose Trail Running Shoes
What is the difference between trail running shoes and road running shoes?
Trail running shoes differ from road shoes in four main structural ways: lugged outsoles for grip on varied terrain (road shoes use smooth rubber optimised for tarmac); rock plates that protect against sharp rock and root impacts (absent in almost all road shoes); higher torsional rigidity to resist ankle-compromising twists on uneven surfaces; and reinforced uppers that resist abrasion from rocks, branches, and debris. Road shoes are lighter and more cushioned for consistent paved surfaces; trail shoes sacrifice some weight and flexibility for protection, grip, and stability on unpredictable terrain.
How much heel drop should trail running shoes have?
For most runners, a medium drop of 4–8mm is the best starting point for trail running — it is the most versatile range and accommodates a range of foot strike patterns without forcing form changes. Road runners transitioning to trail should match their current road shoe drop or stay within 2mm of it. Transitioning to zero-drop or low-drop trail shoes requires a gradual adjustment period of several months; rushing this transition is a common cause of Achilles tendinopathy and calf strain in new trail runners.
Do I need a rock plate in trail running shoes?
On smooth hard-pack and fire roads: no. On mixed terrain with occasional rocky sections: a flexible TPU or nylon rock plate is worth having. On technical rocky mountain terrain: yes, strongly recommended — it protects against the frequent sharp rock and root impacts that are a constant feature of this terrain. Rock plates add stiffness and reduce ground feel, which is a trade-off experienced runners consider based on terrain and preference.
Should I size up in trail running shoes?
Yes, as a default: size up half a size from your road shoe size. Trail running pushes the foot forward in the shoe on descents, and feet swell more on trails than on roads due to longer durations and varied terrain. A thumb’s width of space between your longest toe and the front of the shoe — checked while standing with your trail socks on — is the fit standard. For ultra-distance running or hot-weather running, consider a full size up. Wide toe box brands (Altra, Topo) typically don’t require sizing up because the toe box design accommodates splay structurally.
How long do trail running shoes last?
Most trail running shoes last 300–500 miles, but trail shoes often reach functional end-of-life through lug wear before midsole degradation — the opposite of road shoes. When lugs are noticeably rounded or worn flat, grip performance drops significantly regardless of how the midsole or upper looks. Check lug condition at 300 miles. Rough terrain, heavier runners, and abrasive hard-pack surfaces all reduce mileage. Rotating between two pairs and cleaning mud from lugs after runs extends lifespan meaningfully.
Are waterproof trail shoes worth it?
In cold wet conditions (below 10–12°C/50–54°F with rain or wet trails): yes, clearly. In warm conditions above 15°C (59°F): usually no — foot perspiration accumulates inside a waterproof shoe faster than the membrane can transmit it out, making feet wetter from inside than the rain makes them from outside. For most recreational trail runners who run in mixed seasonal conditions, a DWR-treated mesh shoe handles light precipitation adequately and a waterproof version is worth owning for specifically cold, wet winter running.
Can I use road running shoes on trails?
On smooth, dry, well-maintained hard-pack trails: yes, with reduced grip and no rock protection. On wet surfaces, loose gravel, rooted terrain, or exposed rock: road shoes are a genuine hazard — smooth outsoles provide near-zero lateral grip on wet roots and loose surfaces. On any terrain with sharp rock: road shoes offer no protection against point-load rock impacts. As trail technical difficulty increases, the case for road shoes decreases rapidly.
What are trail running shoe lugs and how deep should they be?
Lugs are the protruding rubber knobs on the outsole of a trail shoe that grip into soft, uneven, or loose surfaces. Lug depth is measured in millimetres from the outsole surface to the lug tip. Shallow lugs (2–4mm) suit hard-packed dry trails where firm contact with the surface is more important than penetration grip. Deep lugs (6–8mm) are essential for mud and soft ground where the lugs need to bite into the surface and self-clean as the foot strikes. Medium lugs (4–6mm) are the most versatile. On technical dry rock, rubber compound (sticky vs. standard) matters more than lug depth.
Do I need trail shoes specifically for overpronation?
Not always. The overpronation pattern identified on a flat treadmill in a running store describes a consistent inward roll on a predictable surface. Trail surfaces change with every stride, which naturally moderates the consistent roll pattern that triggers stability shoe recommendations on flat surfaces. Most mild overpronators run comfortably in neutral trail shoes without the injury patterns they experience in neutral road shoes. If you are a significant overpronator with a history of trail-specific injury, trail stability shoes (Asics Gel-Trabuco, Brooks Caldera) are available and effective — but try a neutral trail shoe first.
What is the best trail running shoe for beginners?
A beginner’s first trail shoe should be versatile rather than specialist: moderate stack height, 4–5mm multi-directional lugs, a drop that matches their current road shoes, firm heel counter for ankle stability, and half a size up from their road shoe size. Resist the pull toward the most aggressive or most minimal shoe — versatility and forgiveness serve beginners better than specialist performance while terrain preferences and running form are still developing.
: Stop Foot Pain Now")


: Fix Shin Splints and Foot Pain")
")


